Friday, December 08, 2006

Shooting Panoramas

Panorama Frames
Once you've collected your gear, it's time to shoot some panoramas.
  1. Pick a good location. This concept is basic to all photography, but is even more important when taking spherical images. I find you need to be in proximity to a tall object, or in a valley or canyon for the final image to be successful. You usually don't want 50% of your image to be sky. The camera should be about 1.5m from any object, including the ground.
  2. Attach your camera to your panorama rig with the lens' optical center at the center of rotation. This is something you should do before you venture into the field. If you are "just winging it", then make sure you are not closer than 3m to an object otherwise you may have too much parallax to correct in software.
  3. Level your rig. Use bubble levels to make sure your horizontal rotator is level and use a secondary bubble level on the camera to unsure your vertical rotator has the camera level. The first frame will be the "key" frame from which all angular measurements are made for subsequent frames. If this frame is not level, then the horizon in your panorama will appear as a sine wave, which can be corrected - but who needs that hassle?
  4. Set the camera to manual exposure and manual focus. If you are not shooting high-dynamic-range sequences, then expose for the brightest portion of the scene. Manually set you focus to the hyperfocal point for your lens/aperature. Attach a cable release.
  5. Shoot a horizontal series of frames with 50% overlap. My lens allows me to shoot a frame every 45° to achieve correct overlap.
  6. Shoot the zenith and nadir points. I shoot the nadir twice; first by pointing straight down to the top of the tripod, which is useful for stitching; second by hand holding the camera in the same approximate postion but with the tripod out of frame, which is useful for faking the nadir in the final spherical image. You should end up with a series of pictures similar to the photo on this page.

Wednesday, December 06, 2006

Getting Started with 360° Spherical Panoramas


Joshua Tree Panorama
Originally uploaded by SdosRemedios.

Gear

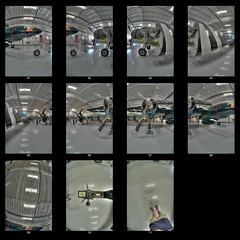
I get a request from time to time asking about how to get started with panoramas so here's a brief introduction to the gear you will need.

  • Digital camera - get the widest lens possible shy of a true fisheye (trust me on this). I use a 10.5mm DX Nikon lens or a 12-24mm DX Nikon zoom at 12mm for my panos.

  • Cable release

  • Dual axis bubble level, the type that fits into your flash hot shoe.

  • Pano head - There are many out there but I recommend the Nodal Ninja if you're just starting out or you plan to always have it with you - it is very small. Really Right Stuff makes the best, but it's quite expensive.

  • Tripod - something very solid and with a ball head. Remember you are going to be taking LOTS of images from a single point and you don't want any movement at all.

  • Software - PTGui for stitching your images together. Photomatix if you're doing high dynamic range preprocessing - highly recommended for outdoor panoramas where light levels vary widely in a single shot. Pano2QTVR for converting equirectangular panoramas to Quicktime VR. Photoshop for tweaking sharpness, contrast and brightness.


Stay tuned on how to use this gear to make panoramas.